Configure Payconiq
1. Via the Payconiq sticker
Do you already have a Payconiq sticker with a fixed QR code in your store? Then you only need to enable the Payconiq payment method in the backoffice.
You can do this via 'Register' > 'Parameters' > 'Payment methods'. Don’t forget to click save at the bottom of the page. After restarting the POS software, the payment method will be available.
Do you want to link the amount to the QR code?
For this, you need to obtain an API Key and PPID from the Bancontact Pro Portal:
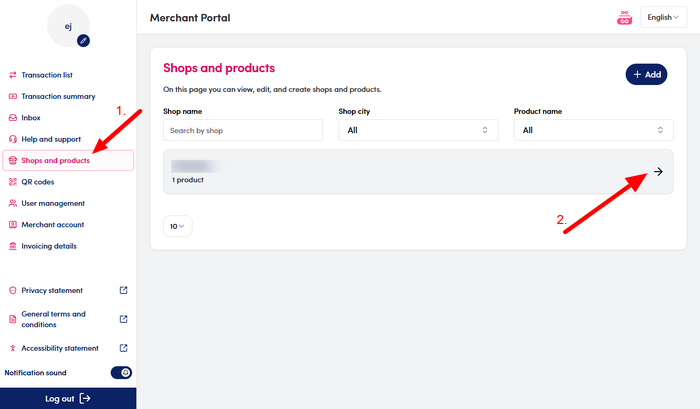
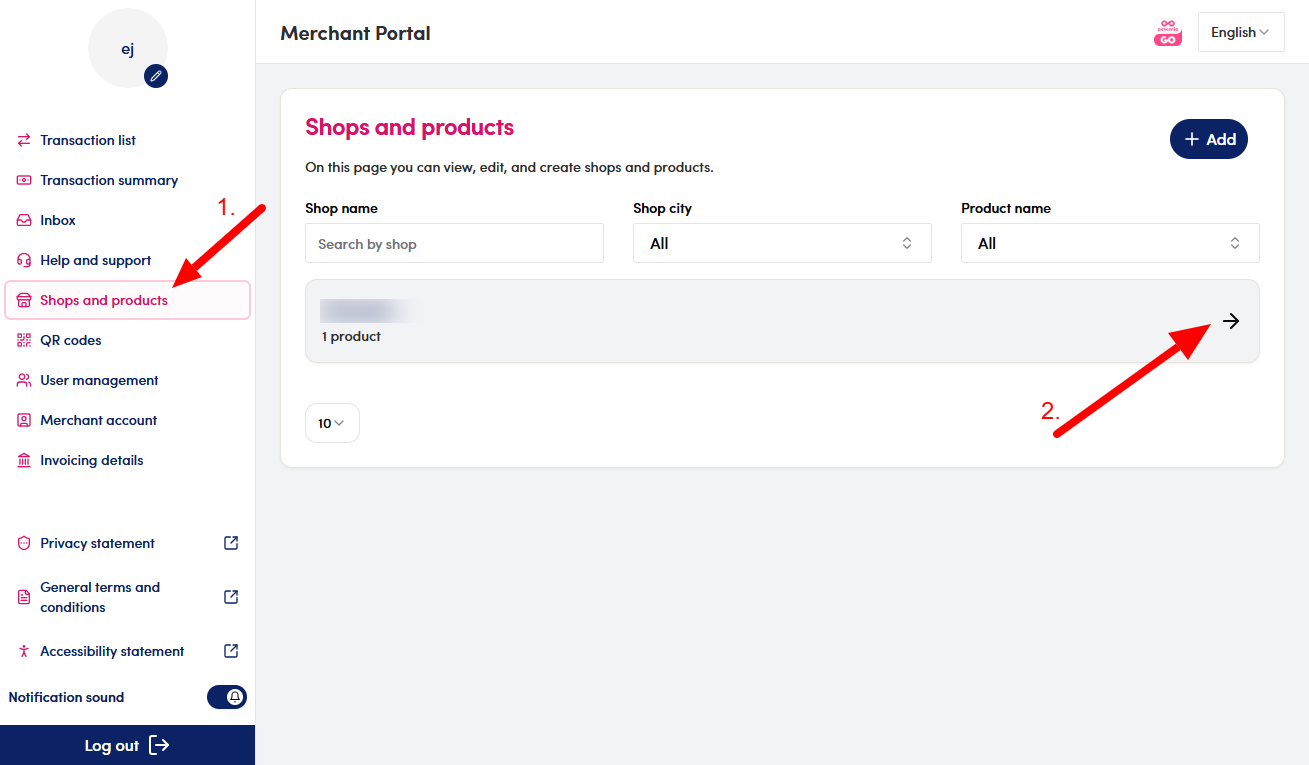
- In the left navigation menu, go to 'Shops and products'
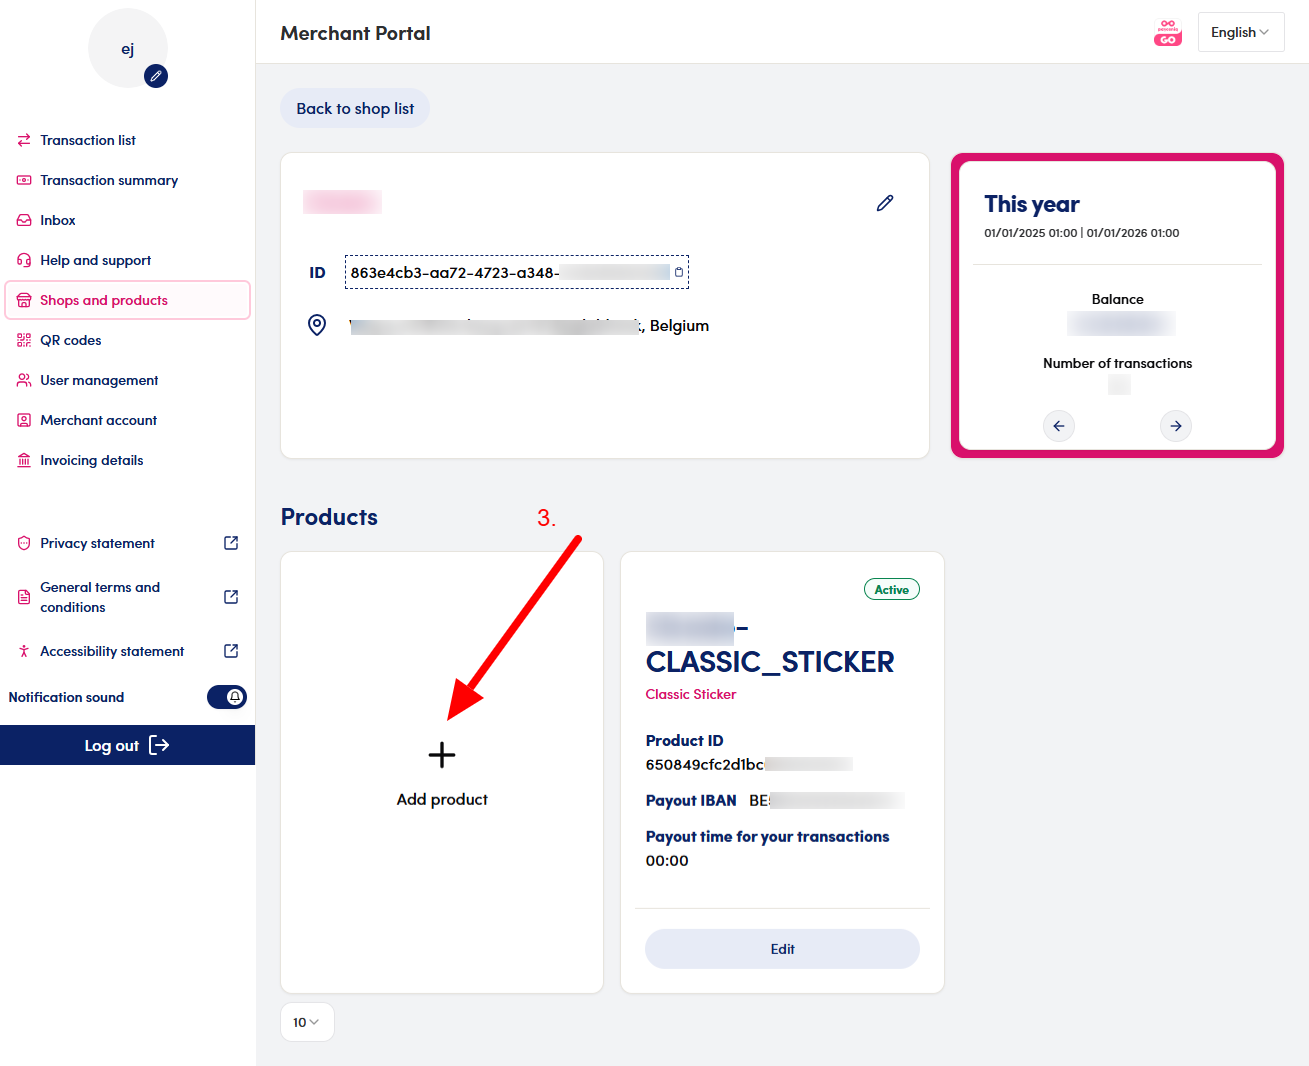
- Select your store from the list
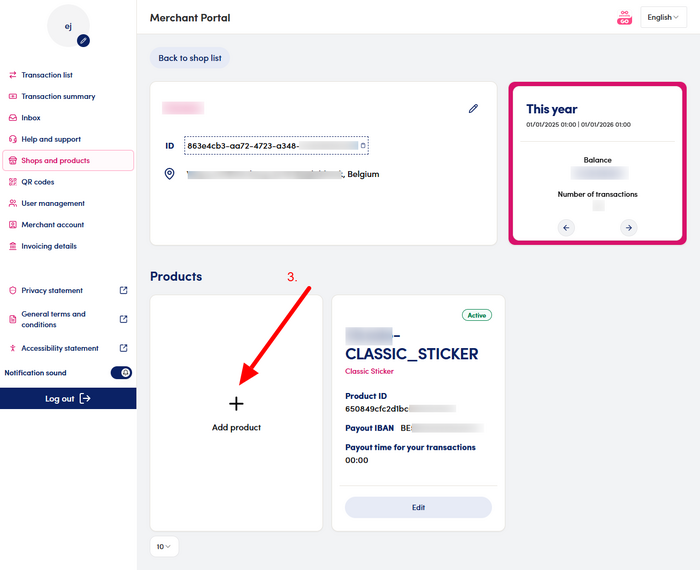
- Click 'Add product'
- Select 'Integration required'
- Select 'Static Sticker'
- Click 'Next'

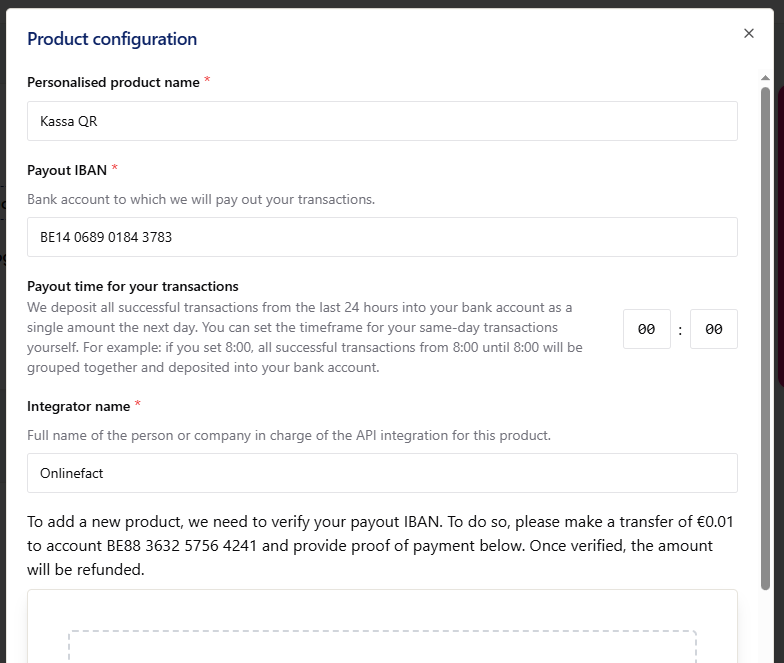
- Fill in the remaining required information
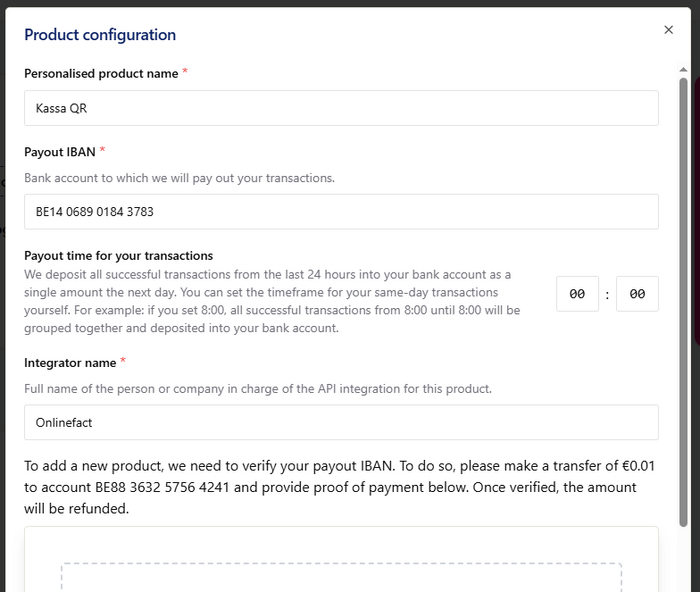
- You will then receive the required authentication keys (note the API Key and the PPID)

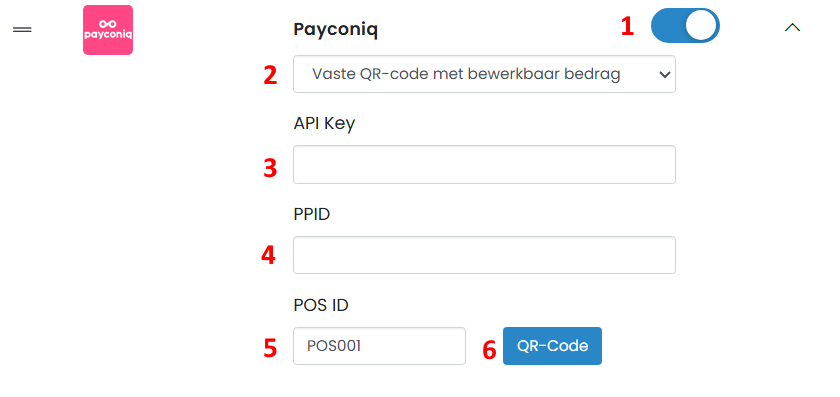
You can then configure these in the backoffice under 'Register' > 'Parameters' > 'Payment methods'
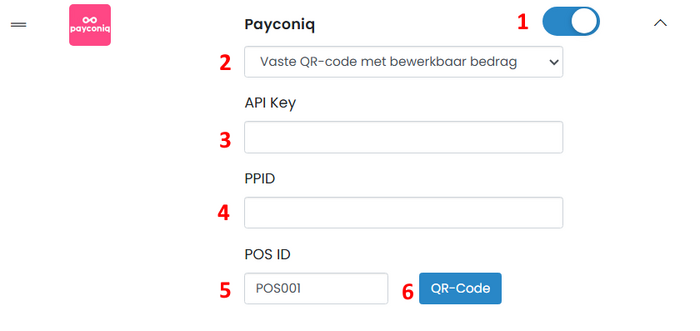
- Find Payconiq in the list and enable it
- Select 'Fixed QR code with editable amount'
- Enter your API Key
- Enter your PPID
- Enter your POS ID, this is the name shown to the customer in the Payconiq app. You can choose freely, for example: 'REGISTER1'
- Click the blue 'QR-code' button
- Your browser will open a new tab with the QR code, which you can print and place at the register.
- The QR code is now linked to the current transaction at the register.
- Don’t forget to click save at the bottom of the page
- After restarting the POS software, the payment method will be available. The POS will now wait for payment confirmation during checkout.
2. Digital QR code via your display
If you want the POS to generate QR codes itself, you can do this using our Payconiq integration.
For this, you need to obtain an API Key from the Payconiq Merchant Portal:
- In the left navigation menu, go to 'Shops and products'
- Select your store from the list
- Click 'Add product'
- Select 'Integration required'
- Select 'On Display'
- Click 'Next'
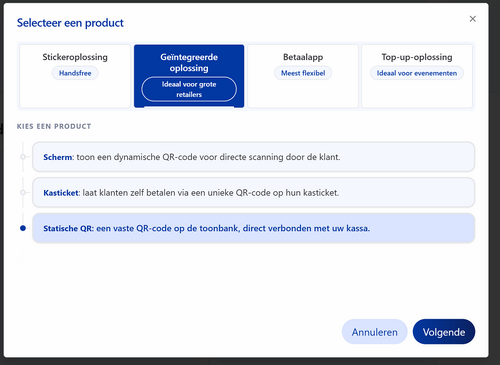
- Fill in the remaining required information
- You will then receive the required authentication keys (note the API Key)
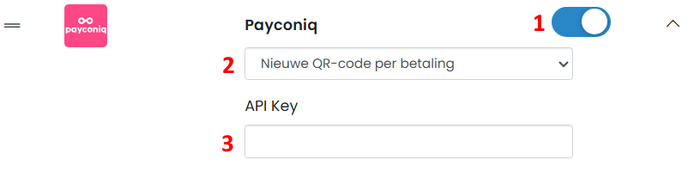
You can then configure this in the backoffice under 'Register' > 'Parameters' > 'Payment methods'
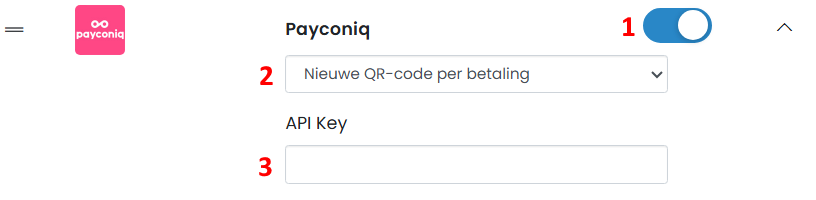
- Find Payconiq in the list and enable it
- Select 'New QR code per payment'
- Enter your API Key
- Don’t forget to click save
- After restarting the POS software, the payment method will be available. The POS will now wait for payment confirmation during checkout