Connecting your payment terminal to your Onlinefact POS requires several steps on both the POS system and the terminal itself.
- Connect to Wi-Fi
- Configure the payment terminal
- Activate settings in the Onlinefact Backoffice
- Run a test
1. Connect to Wi-Fi
| 1. From the home screen, go to “Settings” | 2. Password: 166831 or pax9876@@ | 3. Go to “Network & Internet” |
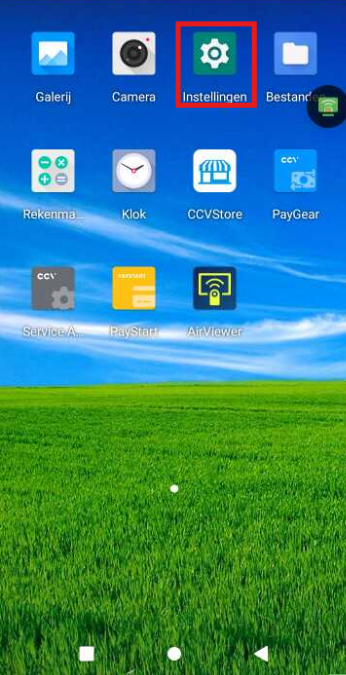 | 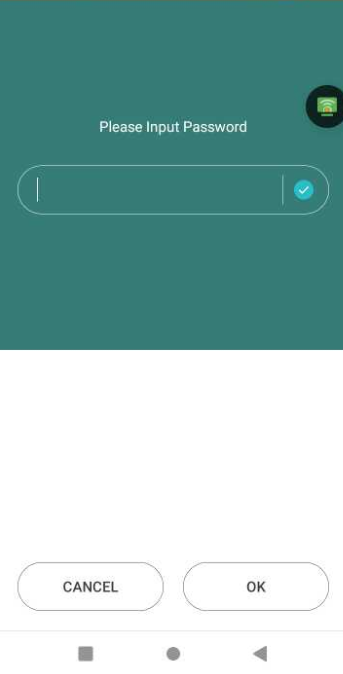 | 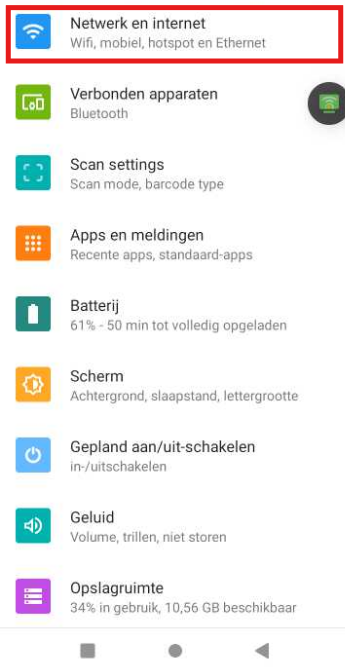 |
| 4. Select “Wi-Fi” | 5. Choose your desired network from the list and connect | |
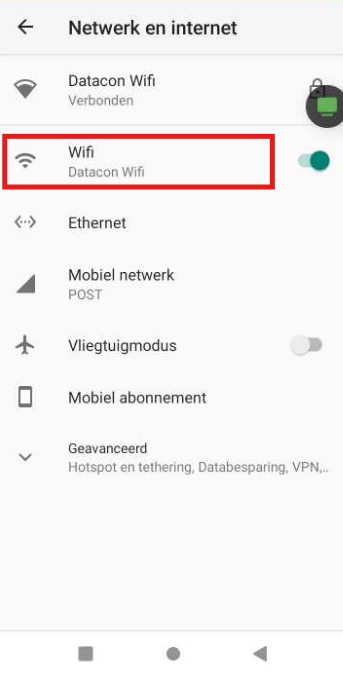 |
2. Configure the payment terminal
| 1. Select the connected network | 2. Expand “Advanced settings” | 3. Note the following information: IP Address, Gateway, Subnet Mask, DNS and DNS 2 (if available). You will need this later. |
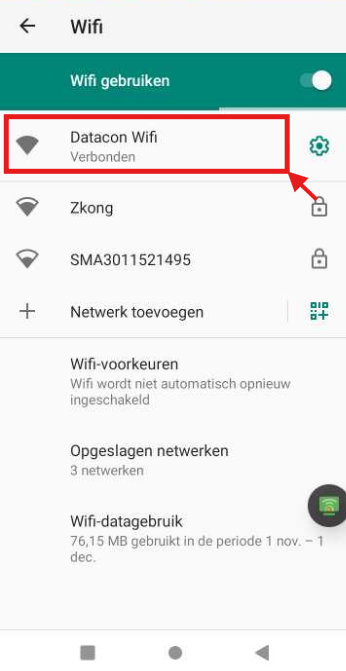 | 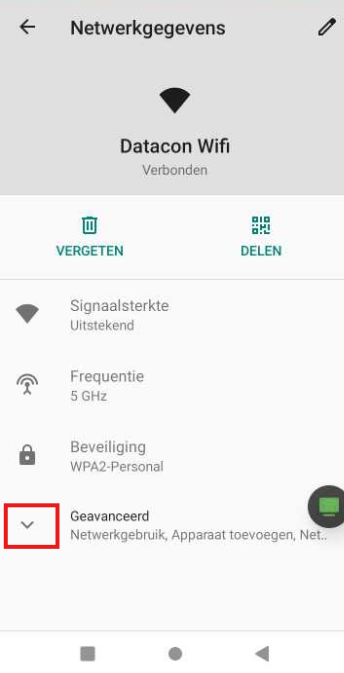 | 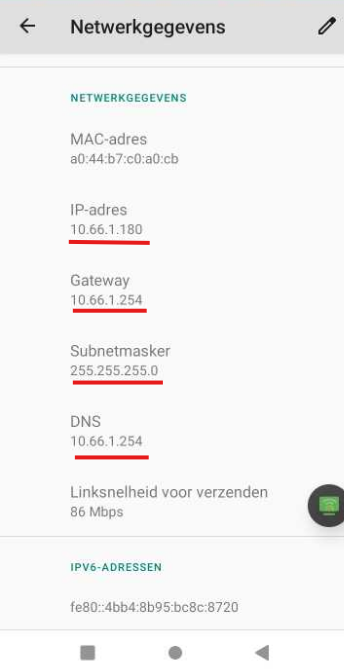 |
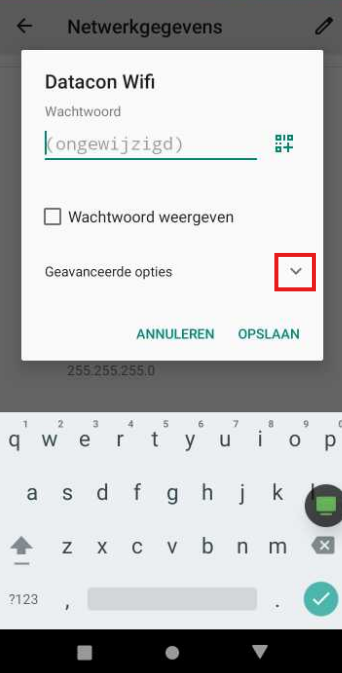
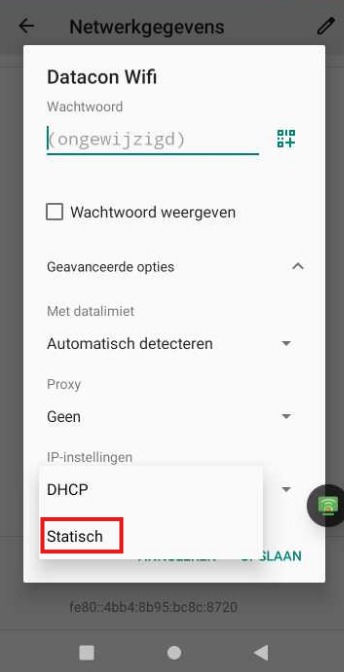
| 4. Tap the pencil icon in the top-right corner to edit the network | 5. Expand “Advanced options” and scroll down | 6. Set IP settings to “Static” |
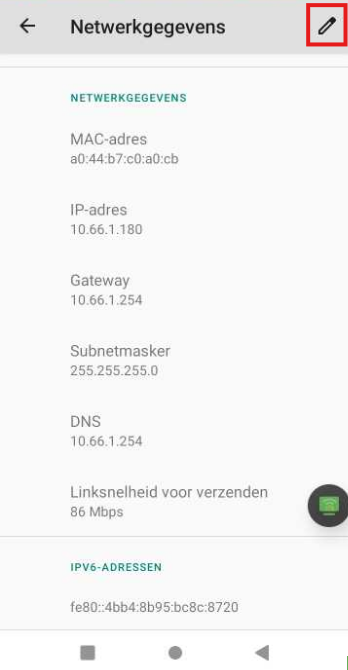 |  |  |
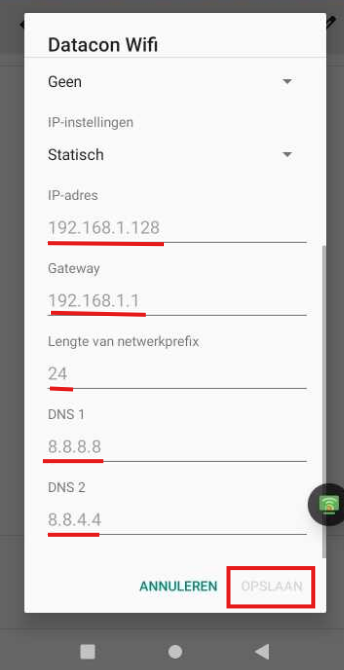
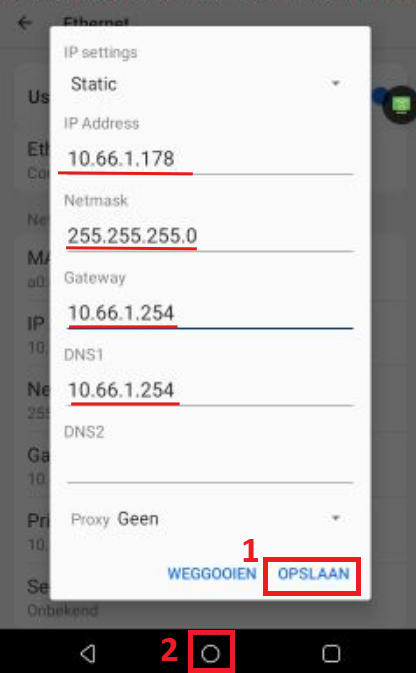
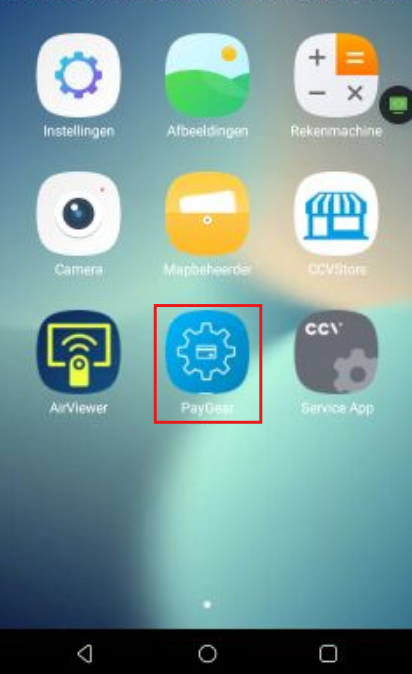
| 7. Fill in the details noted in step 3. Write down your IP Address – you’ll need it later. | 8. Press “Save”, then press the Home button (round circle at the bottom bar) | 9. Open the “PayGear” application |
 |  |  |
3. Activate settings
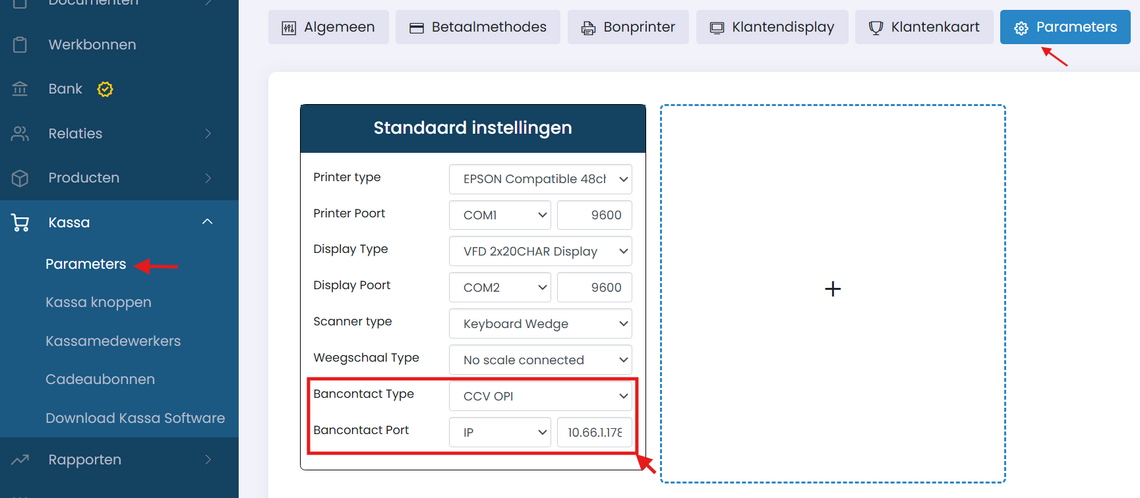
In this final step, we configure via the Onlinefact Backoffice that your POS should send all payment instructions directly to the terminal.
Under “Bancontact Type”, select “CCV OPI” and under “Bancontact Port”, select “IP” and enter the IPv4 address you noted earlier.
4. Testing
Restart the POS software so that the new parameters become active. Then create a sale and select “Bancontact” or “Credit Card” as the payment method.
