Setting up Axium / RX5000
Connecting your payment terminal to your Onlinefact POS requires several actions on both the POS and the payment terminal.
- Set a static IP address on the POS
- Configure the payment terminal
- Activate the settings in the Onlinefact back office
- Perform a test
1. Configure a static IP address on the POS
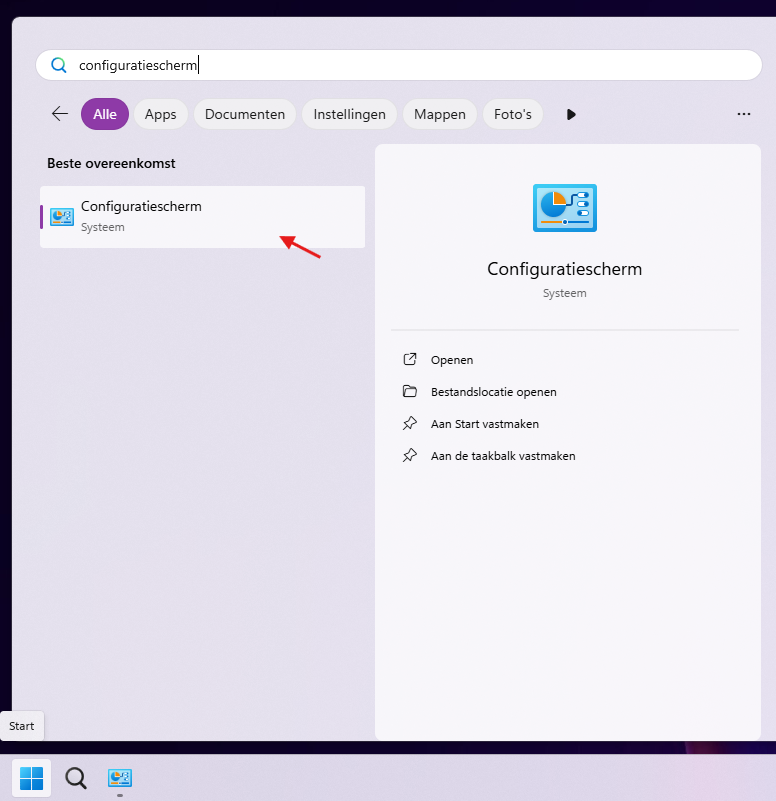
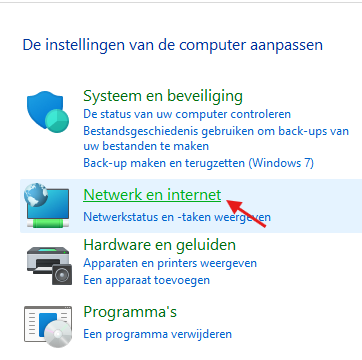
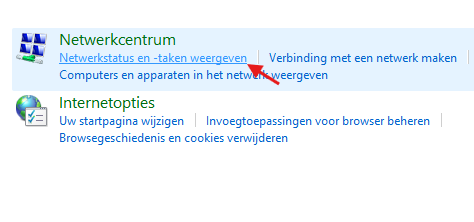
Search in Windows for 'Control Panel'. In the Control Panel, click 'Network and Internet'. Then click 'View network status and tasks'. Click 'Ethernet', then 'Details...'.
|
|
|
|
|
|
|
|
|
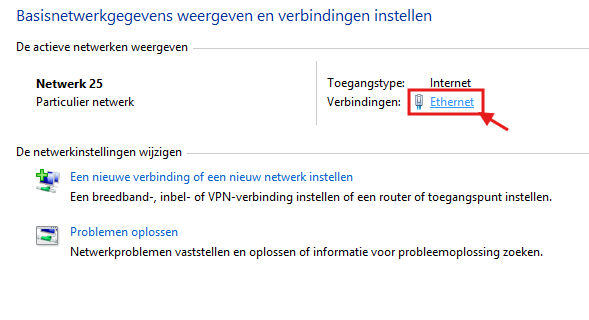
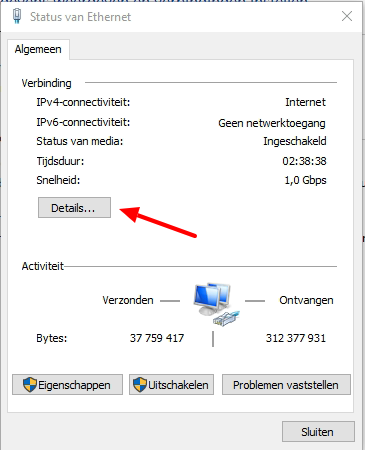
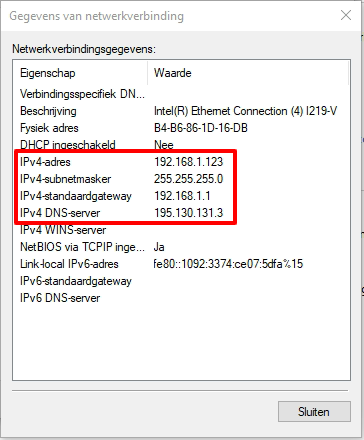
Write down the values you see; you will need them later!
You will definitely need the following information:
IPv4 address : ……………
IPv4 subnet mask : ……………
IPv4 default gateway : ……………
IPv4 DNS server : ……………
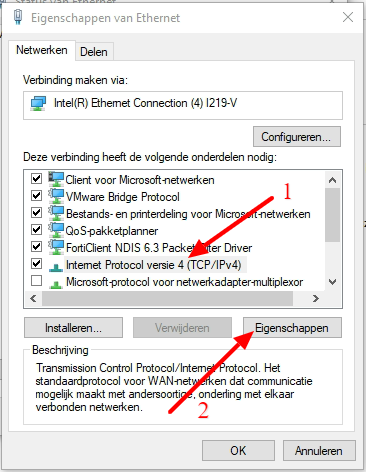
Close the window and select “Properties” in the “Ethernet Status” window. In the new window, first click on “Internet Protocol Version 4 (TCP/IPv4)” and then on “Properties”.
|
|
|
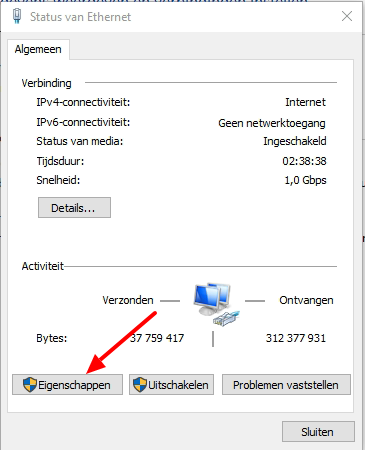
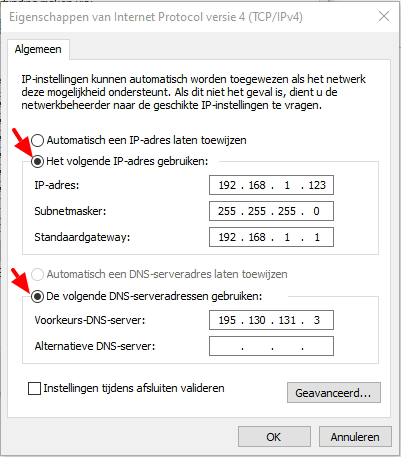
Enter the data you have just written down and confirm at the bottom with “OK”.
2. Configure the payment terminal
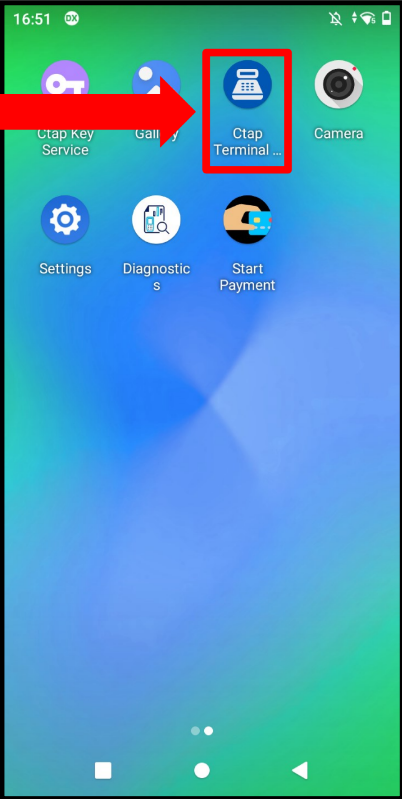
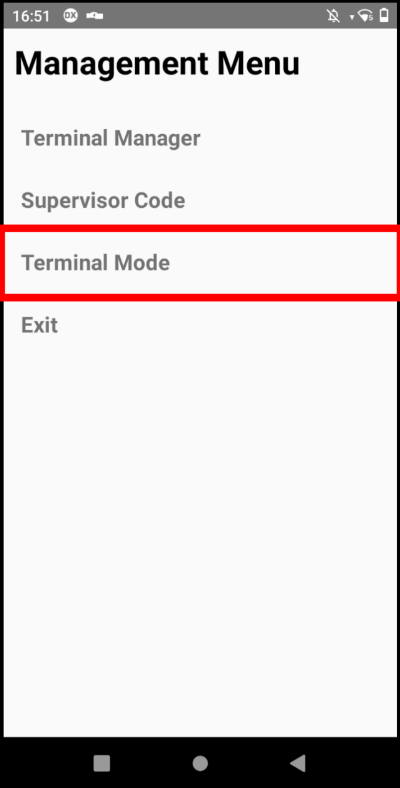
| 1. Tap the 'Ctap Terminal' icon on the home screen
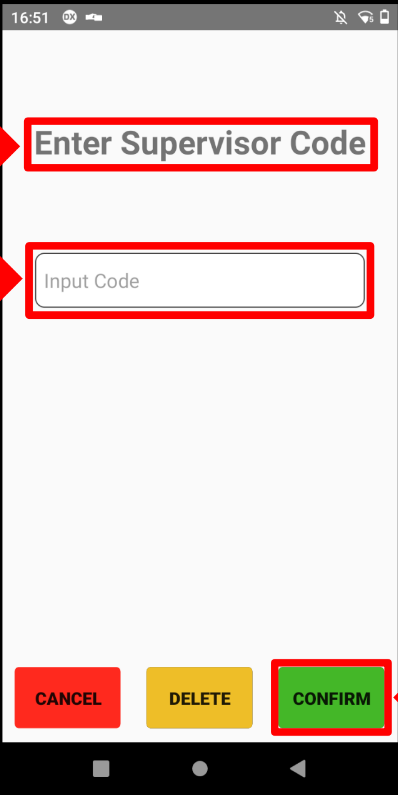
| 2. Supervisor code: 11223344 Press: CONFIRM
| 3. Choose 'Terminal Mode'
|
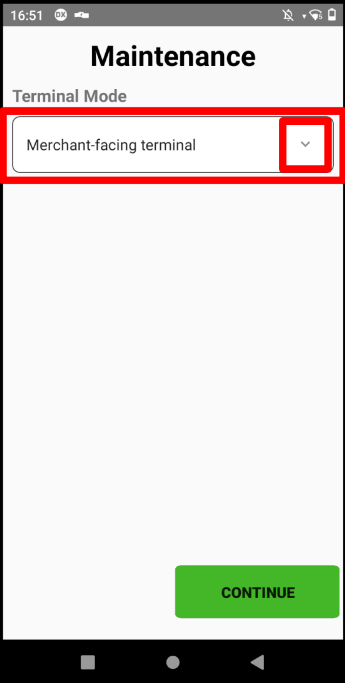
| 4. Tap the arrow to change the terminal mode
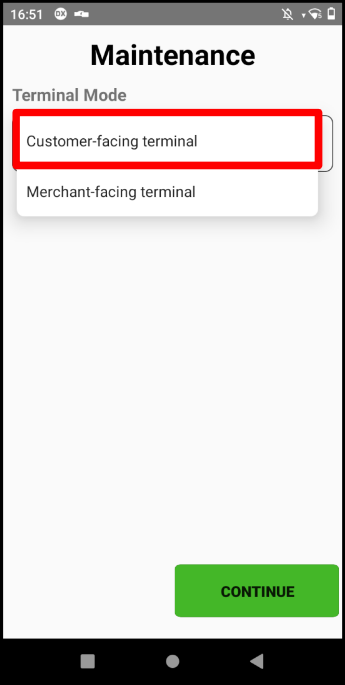
| 5. Select 'Customer-facing terminal'
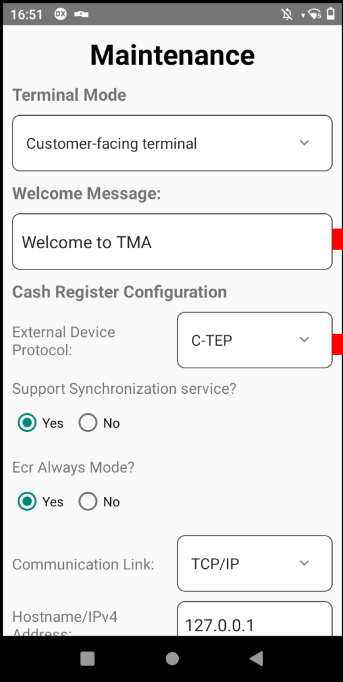
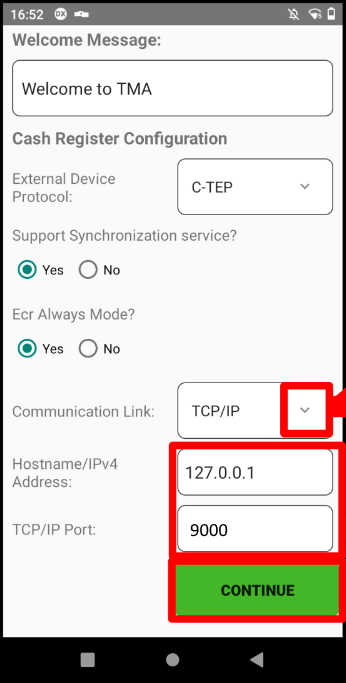
| 6. Set a message. For 'External Device Protocol', select 'CTEP'
|
| 7. Communication link: TCP/IP For Hostname, enter the static IP address you configured earlier on the POS. TCP/IP port: 9000
|
3. Activate the settings
In this final step, we tell the Onlinefact back office that your POS must forward all payment terminal commands to the terminal.
For Bancontact Type, select “CTEP” and for Bancontact Port, select “IP” with the IPv4 address you used earlier.

4. Testing
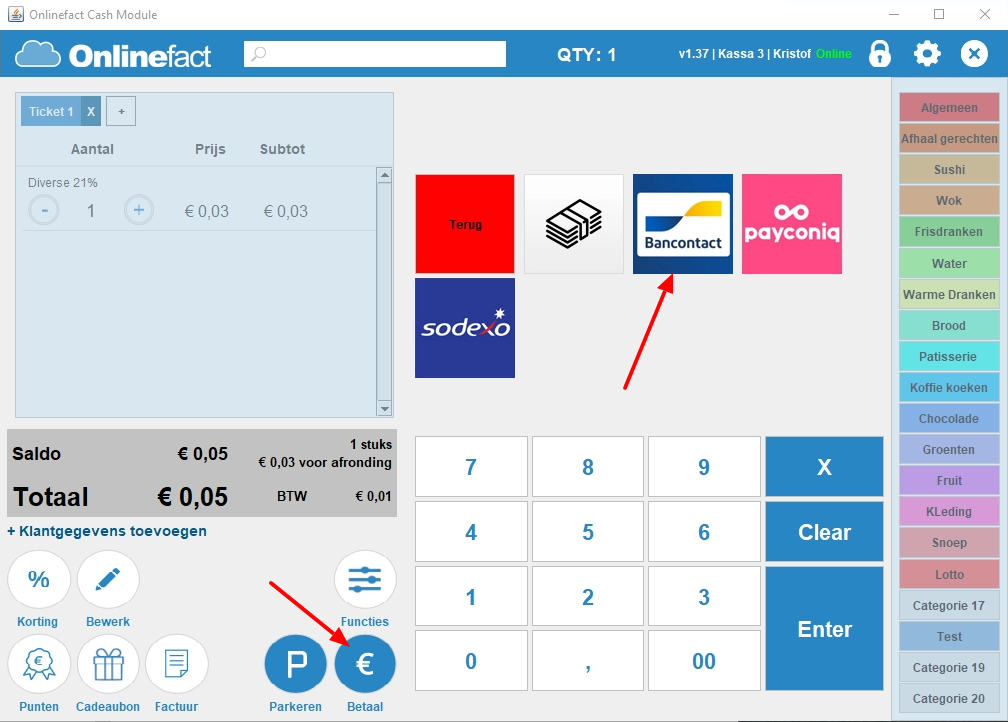
Restart the POS software so that the new parameters become active. Create a sale and, for the payment methods, press “Bancontact” or “Creditcard”.